
It’s time to add your branding! Brand settings enable you to customize the visual aspects of your calculators to match your brand.
To set up your brand settings, follow these steps:
The brand settings in your account will add branding universally for all of the calculators in your account.
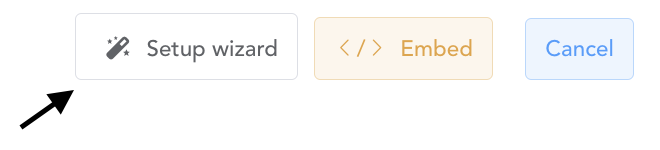
- Step 1: In the "Brand Settings" page click into the Setup Wizard in the upper right-hand corner:
-
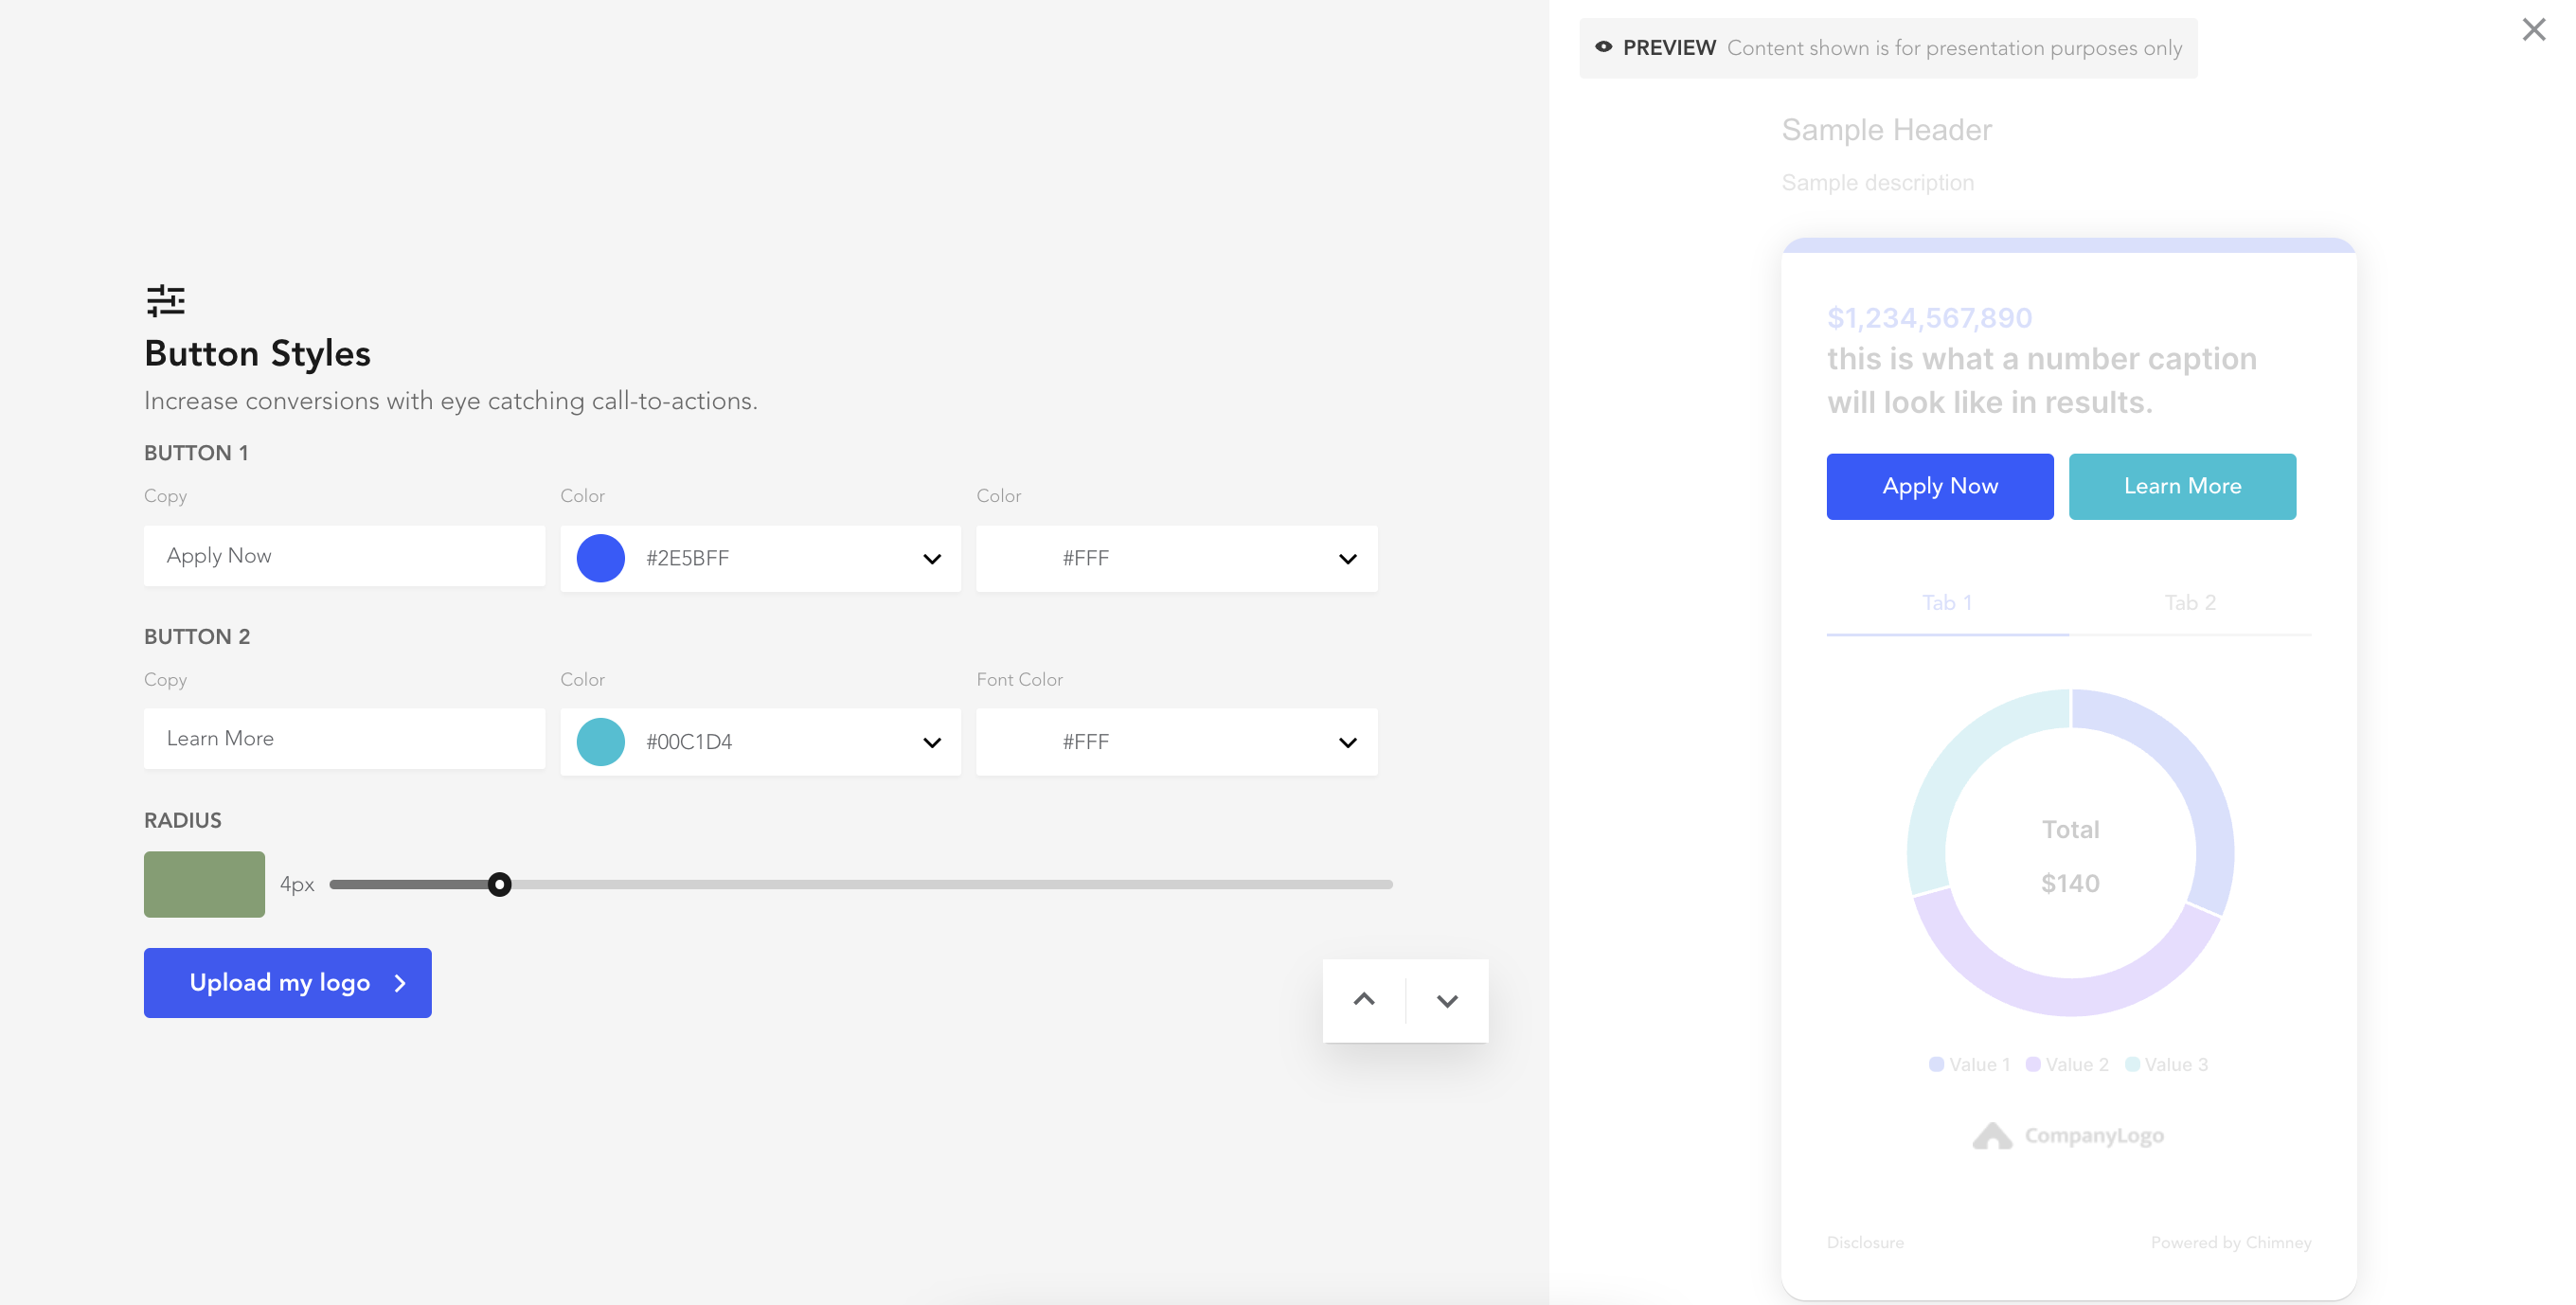
This will take you to the configuration page where you can manage your brand settings and other customization options.
-
-
-
Note: The radius of the Call to Action buttons can only be adjusted within the setup wizard as shown below:
-
You can also update the the following settings outside of the Setup Wizard by following the instructions below:
Click "Save and Set Live" in each step to save any changes made.
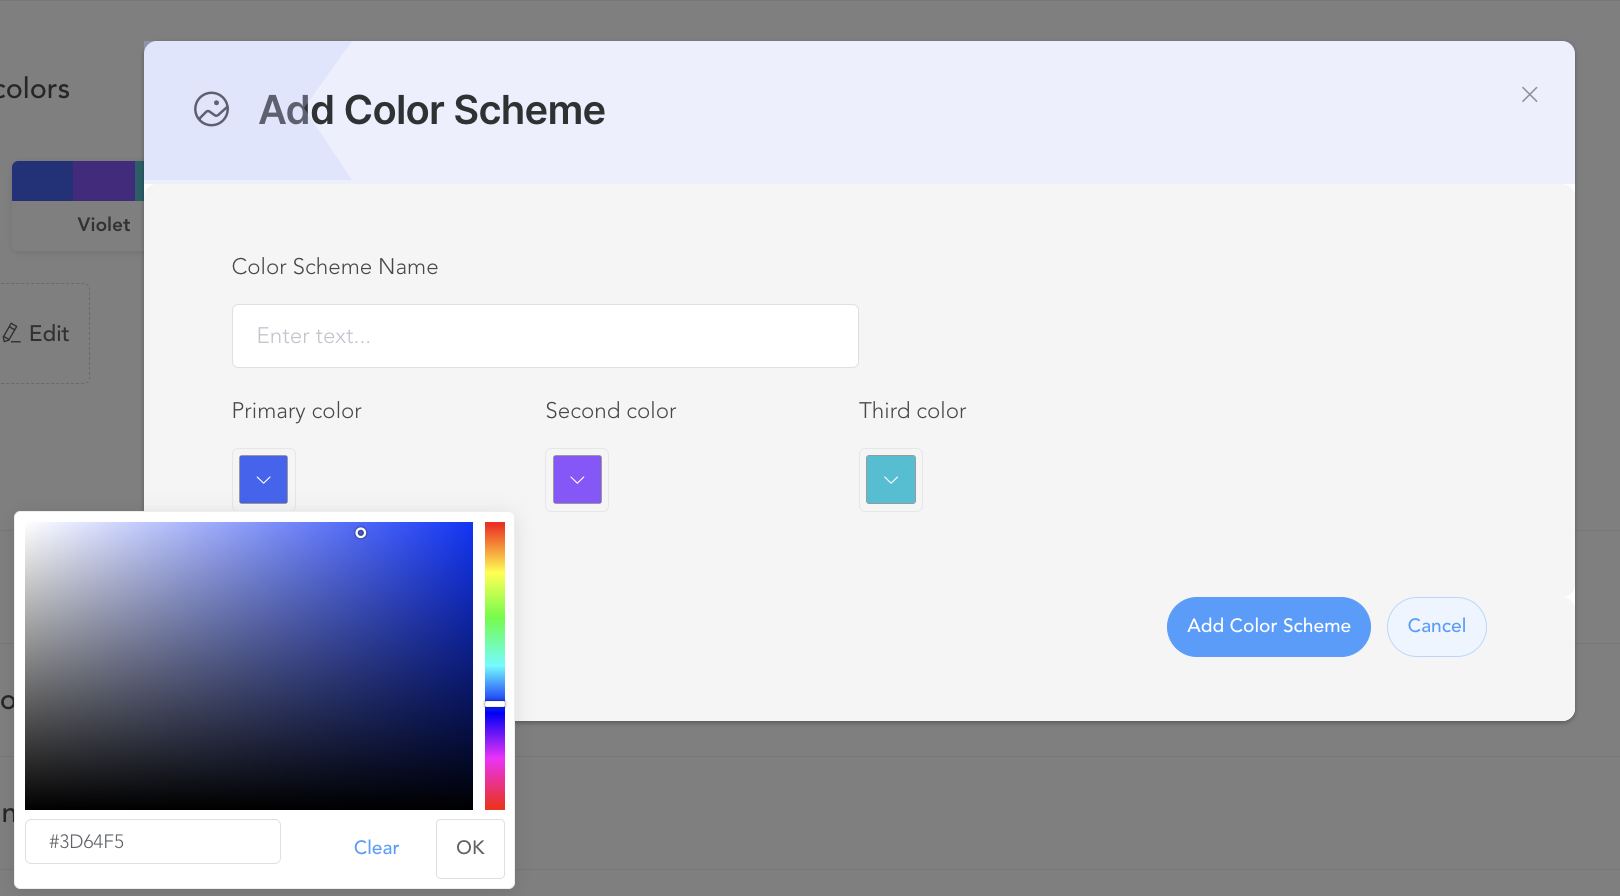
- Step 1: Customize your brand colors:
- Click the "Add New" button to create a new color scheme.
- Choose your three primary hex codes for your brand colors.
- Give your color scheme a name.
- Click "Add Color Scheme" to save your changes.
- Step 2: Select your fonts:
-
Choose the font type and font sizes that best represent your brand. (Note: You can hide the title and subtitle copy on your "Calculators" screen if desired by leaving these fields blank).

-
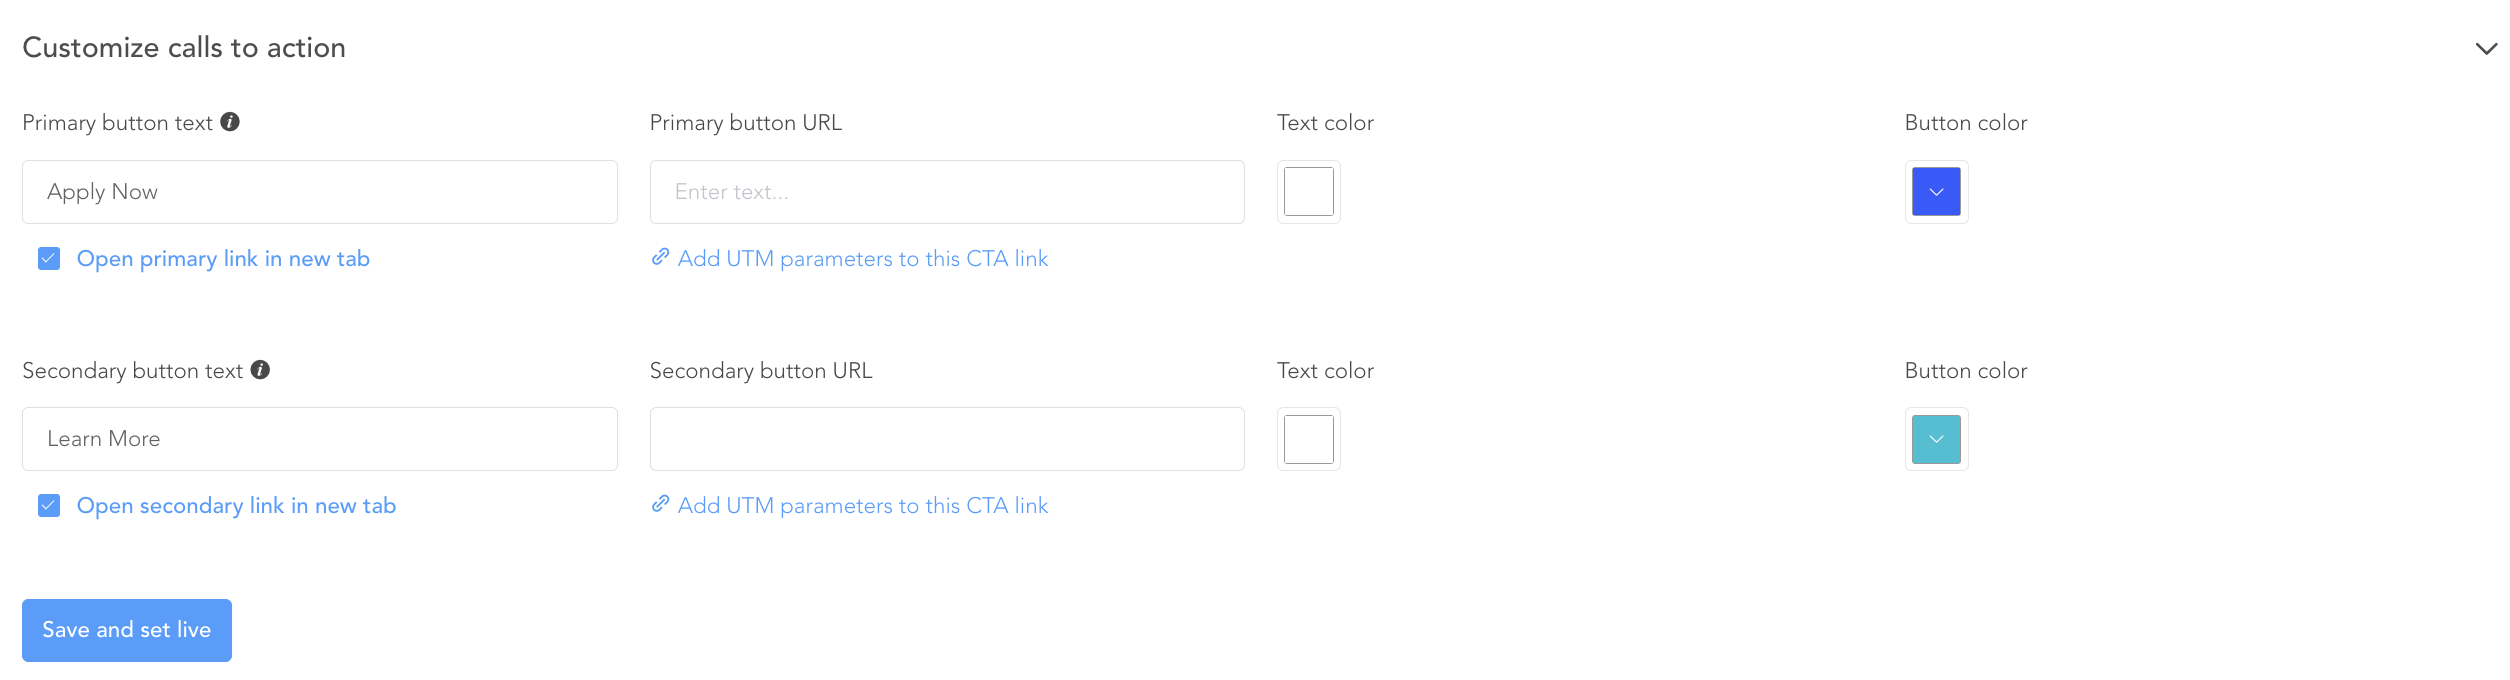
- Step 3: Call to Action buttons:
-
Set up your call to action buttons by specifying the copy, URLs, and colors for each button. (Note: CTA buttons can also be customized for each individual calculator on your "Calculators" screen, but this will help set your defaults).
-
-
Step 4: Uploading your logo:
-
Click the upload button to add your logo.
-
Ensure that the logo has a transparent or white background.
-
The recommended dimensions for the logo are 200 x 36 pixels.

-